


The video analysis and machine learning features provided by SuperMap iDesktopX require a Python environment and scripts to execute. Since the environment packages occupy a large amount of disk space, the basic product package does not include the relevant environment. To use video analysis, machine learning, and other functions, you need to download the extension package and perform simple environment configuration.
The recommended configuration for video analysis is as follows:
- When more than 10 video streams are used and each stream is detected every 5 seconds, the CPU has the greatest impact on performance. A server CPU is required. The recommended hardware configuration is as follows:
- CPU: 2x Intel(R) Xeon(R) Gold 5218 CPU @ 2.30GHz, 16 cores, 32 threads;
- Memory: 32G;
- GPU: RTX 2060;
- Hard Drive: SSD.
- When fewer than 10 video streams are used, but each stream requires real-time analysis (detection and tracking), the GPU has the greatest impact on performance, followed by the CPU, and finally the memory. The recommended hardware configuration is as follows:
- CPU: 1x Intel(R) Xeon(R) Gold 5218 CPU @ 2.30GHz, 16 cores, 32 threads (if using Pytorch model, i9 12900k is also sufficient);
- Memory: 128G (or 64G for Windows);
- GPU: RTX 3090 or RTX 3090TI;
- Hard Drive: SSD, size depends on the size of saved videos.
The recommended GPU configuration for machine learning is as follows:
- NVIDIA GPU;
- Video memory ≥ 10GB, minimum requirement is 6GB. If using the object extraction or SegmentAnything model for AI labeling, the video memory must be greater than 8GB;
- Latest GPU driver.
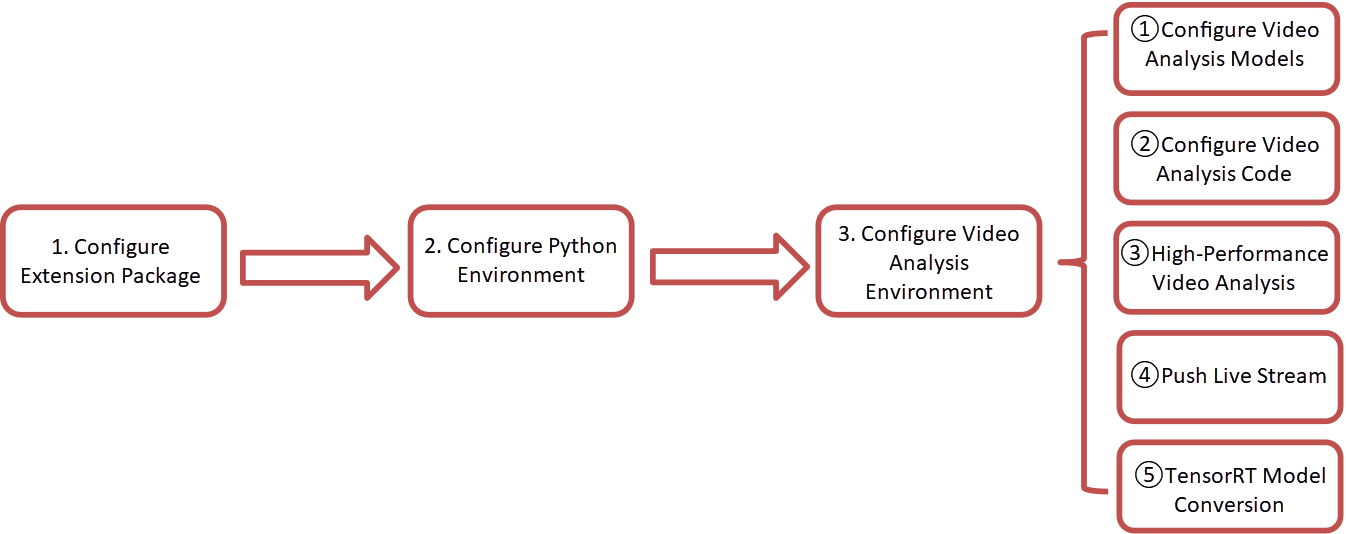
Environment Configuration Process:
The steps for environment configuration are shown in the flowchart below. Steps ③, ④, and ⑤ in configuring the video analysis environment are not mandatory and can be configured based on actual requirements.
1. Configure Extension Package
Obtain the Extension Package
Download the SuperMap iDesktopX Extension_AI for Windows extension package (hereinafter referred to as the extension package) that corresponds to the version of the SuperMap iDesktopX product package (hereinafter referred to as the product package).
Extension packages after V12.0.1 no longer support the video analysis module. Please download version V12.0.0 or V12.0.1 of the extension package for use:
V12.0.0 download address: https://pan.baidu.com/s/14jQ4GuOmjL8E3sVIUXO7Vw, extraction code: srx9.
V12.0.1 download address: https://pan.baidu.com/s/1iM4j46fwF2QZDQwqkkmv0Q, extraction code: 4wqv.
The extension package provides the following resources:
- resources_ml: machine learning resource package, including sample data, model config files, etc.;
- support:
- MiniConda: Runtime environment for AI analysis.
- templates: Video effects resources.
Configure the Extension Package
Copy the resource_ml, support, and templates folders from the extension package to the root directory of the product package. The path to the product package must not contain Chinese characters.
2. Configure Python Environment
- Open SuperMap iDesktopX, click the Start tab -> Browse group -> Python button, and the Python window will appear below the map.
- Click the Python Environment Manager button on the left toolbar of the Python window to open the Python Environment Manager dialog box.
- Click the Add Exist Environment button to open the Add Exist Environment dialog box.
- In the Python path, select
product root directory/support/MiniConda/conda/python.exe, and the Conda path will be automatically identified. - Click the OK button in the Add Exist Environment dialog box. After the Python environment is loaded, click the OK button in the Python Environment Manager dialog box.
- A prompt dialog box will appear: "The Python environment has been switched. Do you want to restart the Python process immediately?" Click Yes to complete the Python environment configuration.
3. Configure Video Analysis Environment
Configure Video Analysis Model
- Download the video analysis model corresponding to the product package version from the following address: https://pan.baidu.com/s/1WZYDn6RJGsu05Gj-5vZZzQ?pwd=n4kd, extraction code: n4kd.
- Copy the downloaded video-detection folder to the product root directory/support folder.
Configure Video Analysis Code
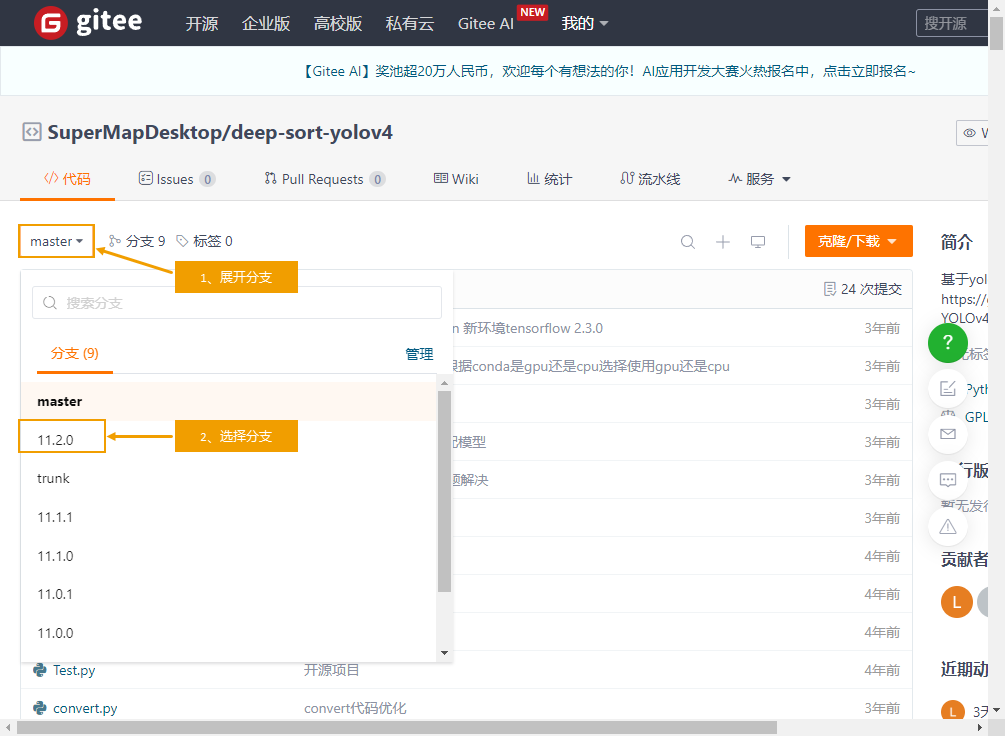
- Download the video analysis code resource package corresponding to the product package version from https://gitee.com/SuperMapDesktop/deep-sort-yolov4.
- Copy the contents of the downloaded video analysis code resource package deep-sort-yolov4-x (x indicates the version number, e.g., for branch 11.2.0, the package name is "deep-sort-yolov4-11.2.0") folder to the product package/support/video-detection/deep-sort-yolov4 folder.

High-Performance Video Analysis Environment
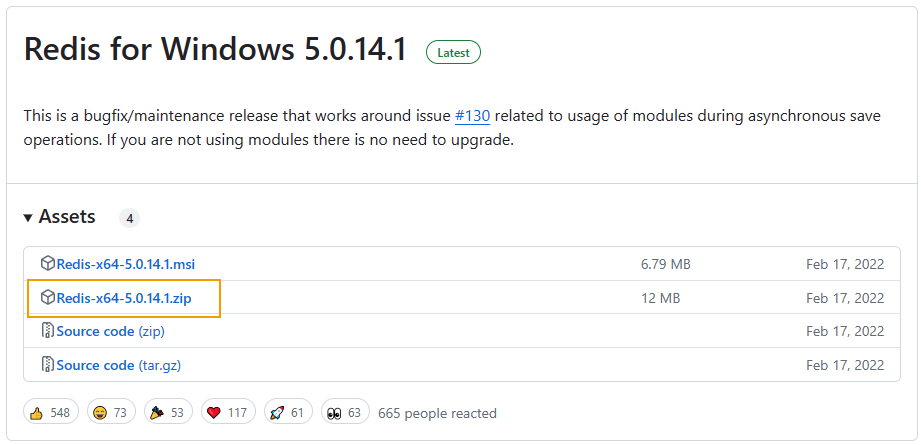
To improve the detection performance of video analysis, it is recommended to configure the Redis environment. Before using high-performance detection, ensure Redis is started. The Redis environment configuration is as follows:
- Download Redis and extract it.
- Double-click to start redis-server.exe in the Redis product directory.
- Open the iDesktopX product package/configuration/Desktop.Parameter.xml file and change HighPerformanceDetection="false" to HighPerformanceDetection="true".
- Start SuperMap iDesktopX.
Push Live Stream
Video analysis results can be pushed as a live stream for easy viewing on the Web. However, additional environment deployment is required. The operation instructions are as follows:
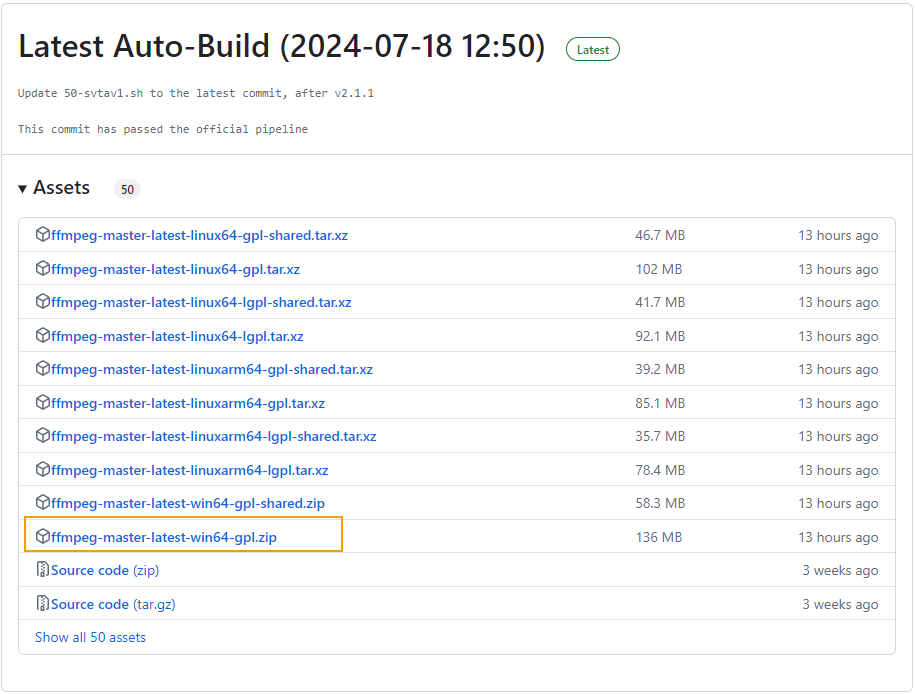
- Download ffmpeg from the official website at: https://github.com/BtbN/FFmpeg-Builds/releases.
- After extraction, copy ffmpeg.exe to the product root directory/support/video-detection/Tools/ directory.
TensorRT Model Convert
SuperMap iDesktopX supports converting YOLOv5 Torch models to the TensorRT format, currently supporting Windows 10 and above. The environment deployment instructions are as follows:
- Download Miniconda3 from: https://docs.conda.io/en/latest/miniconda.html. You can choose versions 3.8, 3.9, or 3.10. Click to download and install.
- Download the TensorRT package and extract it. Click to download from: https://developer.nvidia.com/nvidia-tensorrt-8x-download;
- On the Windows Start menu, run Miniconda3 as administrator to open the console window;
- Enter
conda activate conda path, where the conda path is the path after extracting and configuring the AI extension package; - In the console, navigate to the extracted TensorRT package directory, install graphsurgeon, uff, onnx_graphsurgeon, and TensorRT by running the following commands in sequence:
  cd .\graphsurgeon\
  pip install .\graphsurgeon-0.4.6-py2.py3-none-any.whl
  cd ../
  d .\uff\
  pip install .\uff-0.6.9-py2.py3-none-any.whl
  cd ../
  cd .\onnx_graphsurgeon\
  pip install .\onnx_graphsurgeon-0.3.12-py2.py3-none-any.whl
  cd ../
  cd .\python\
  pip install .\tensorrt-8.6.1-cp38-none-win_amd64.whl
Notes:
When installing TensorRT, you need to choose the appropriate one based on the Python version:
- Version 3.8 corresponds to tensorrt-8.6.1-cp38-none-win_amd64.whl
- Version 3.9 corresponds to tensorrt-8.6.1-cp39-none-win_amd64.whl
- Version 3.10 corresponds to tensorrt-8.6.1-cp310-none-win_amd64.whl
- Copy all dll files from the lib folder inside the extracted TensorRT package to the product root directory/support/video-detection/TensorRT/ directory.