


Map Swipe provides three functions: rolling curtain, flicker and gradient. The specific description is as follows:
- Rolling Curtain
Map Swipe is commonly used with the browsing operation of Remote Sensing Imagery. Generally, the difference between two superimposed images can be viewed through the rolling operation. The operation effect is as follows: the mouse pulls up and down or left and right on the upper image (by rolling). Simulates the action of rolling an image up and down or left and right, thereby rendering the underlying image. Now, the rolling operation can be applied not only to the image, but also to other layers in the map. For example, in the following demonstration dynamic map, a Raster Layer is superimposed on the vector map, and the rolling operation is performed on the Raster Layer.
The layerto be rolled can be any Vector Layer, Raster Layer, Image Layer, or Cache Layer. Meanwhile, the Map Swipe operation can also use Layer Group as the object to be rolled. That is, All Layers below it will be used as a layer for rolling operations.
Note: In order to improve the operation performance of Map Swipe, the program processes the layers in the map as snapshot layers by default when rolling the curtain. Therefore, if a new layer is added in the rolling state, the preview cannot be refreshed in real time. It is not recommended that the user add a new layer when performing the rolling operation.
- Flashing
Flashing is for Swipe Layer. The Swipe Layer is hidden at a set time interval and then displayed again. It can be used for comparative display of Historical Data and current data.
- Gradient
Gradient is for Swipe Layer, which gradually hides the shutter layer according to the set time interval, and then gradually displays it. The difference with the Blink function is that the process of hiding and displaying is slowly changing, while Blink is a process of rapid change.
Application scenario
- Multi-phase Remote Sensing Imagery to check the difference of images in different phases;
- Multi-version Cache, view the difference between different Cache Data in the same region;
- Vector Layer, especially administrative boundaries, to see changes in boundaries, etc.;
Function entrance
Map-> Map Swipe-> Map Swipe button.
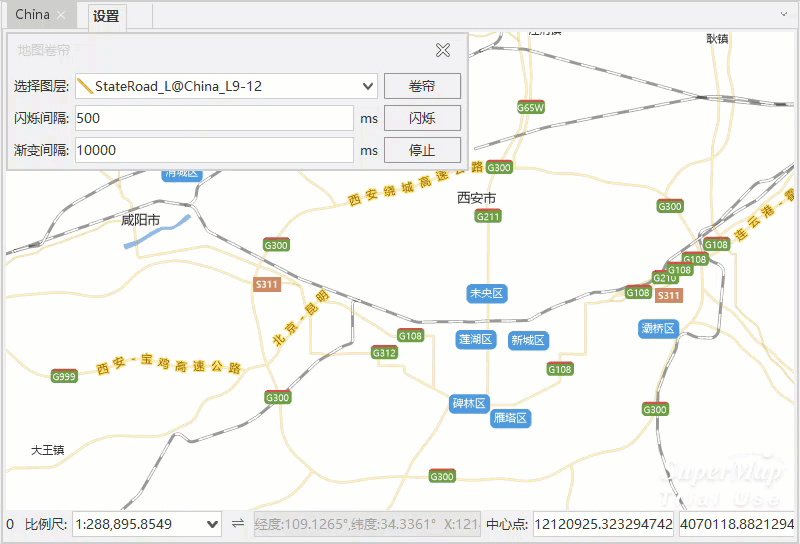
Map Swipe
- On the Select Layer drop-down list of the Map Swipe dialog, select Swipe Layer in Current Map. You can select any layer or a layer under Layer Group, but cannot Select Layer Group.
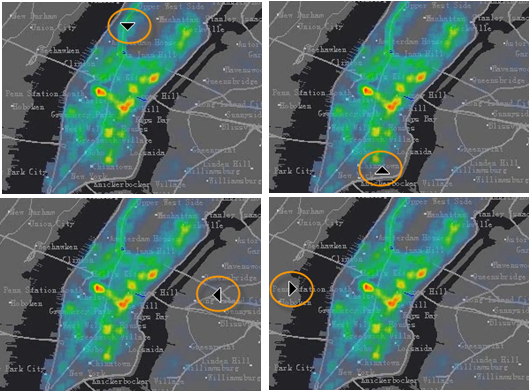
- Click the Roller shutter button to activate it, and the mouse status in the current Map can be switched to an arrow. At this time, according to the position of the mouse in Map, the direction of the arrow of the mouse is different, that is, the direction of the shutter is different, as shown in the following figure:
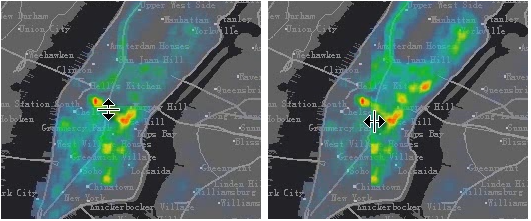
- After switching to the shutter operation mouse state, you can press and hold the left mouse button and drag the mouse up and down or left and right as required to roll the Swipe Layer. At this time, the mouse will display different state icons according to whether the current shutter is left and right or up and down.
- If you want to cancel the Mouse Swipe Operation Status, you can press the Stop button, and the button will not be pressed, then you can cancel the Mouse Swipe Operation; you can also click the right mouse button in Map to cancel the Map Swipe Operation.
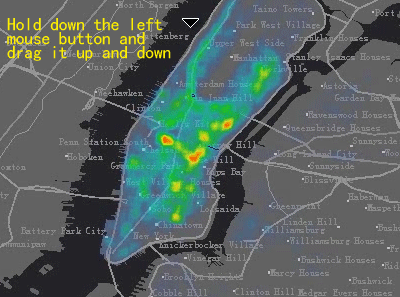
- The operation demonstration diagram of Map Swipe is shown in the following animation:
- When the current Map is the shutter Operation Status, hold down the Shift key and press the left mouse button at the same time, the Swipe Layer and the All Layers on the Display Order will Take in swipe the browsing operation.
 |
| Different mouse States |
 |
| Mouse status icon |
 |
Tips
The map flashes
- On the Select Layer drop-down list of the Map Swipe dialog, select a flicker layer in Current Map to select any layer, Layer Group, or a layer under Layer Group.
- Set the time interval for the layer to flash, that is, the time interval for the layer to hide and display. The unit of time is millisecond.
- Click the Flicker button to activate it. At this time, the flicker layer will be hidden and displayed according to the specified time interval. The specific effect is shown in the following figure:
 |
Map Gradient
- On the Select Layer drop-down list of the Map Swipe dialog, select a gradient layer in Current Map. You can select any layer, but cannot Select a layer under Layer Group or Layer Group.
- Set the time interval of layer gradient, that is, the time interval of layer hiding and displaying. The unit of time is millisecond.
- Click the Gradient button to activate it. At this time, the gradient layer will be hidden and displayed according to the specified time interval, as shown in the following figure:
 |