This section mainly introduces the simple point symbol stroke editing functions provided by the Marker Symbol Editor, mainly including: stroke deletion, stroke copy and paste, undo and restore of editing operations, stroke node editing, stroke layout (alignment), stroke rotation, stroke transformation (mirror and flip). The use of these functions is described in detail below.
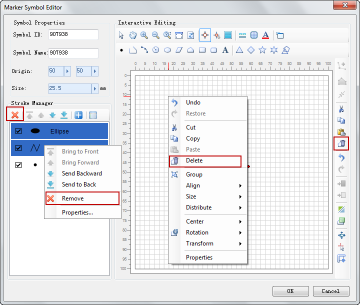
Delete a stroke
- Select the stroke to be deleted, that is, select the stroke through the stroke list in the Stroke Manager area, or select the stroke to be deleted in the symbol editing area, or select multiple strokes with the Shift key or Ctrl key;
- Press the Delete key or click the Delete button on the toolbar to delete the selected stroke. In addition, the selected stroke can be deleted by the Delete item in the Context Menu in the symbol editing area and by the Remove button in the Stroke Manager area.
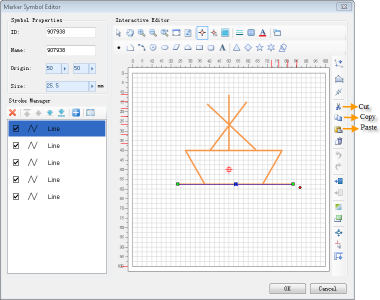
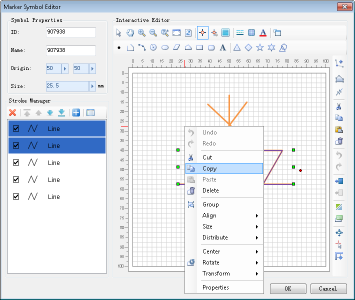
Copy/Cut/Paste Stroke
- Select the stroke to be edited, that is, select the stroke through the stroke list in the Stroke Manager area, or select the stroke to be edited in the symbol editing area, and select multiple strokes with the Shift key or Ctrl key;
- Click the Copy or Cut button in the toolbar to copy the selected stroke to the clipboard; you can also copy or cut through the Context Menu in the symbol editing area;
- Click the Paste button in the toolbar to paste the strokes copied to the clipboard; you can also paste them through the Context Menu in the symbol editing area.
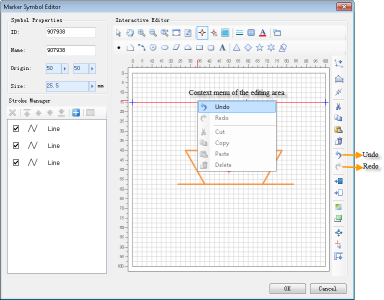
Undo and Redo Editing
The Undo and Restore buttons in the toolbar and the Undo and Restore items in the symbol editing area can be used to undo the symbol editing operation and restore the undone operation, respectively.
Edit a stroke node
The editing of the point symbol stroke node includes two parts: Add Node and Edit Node.
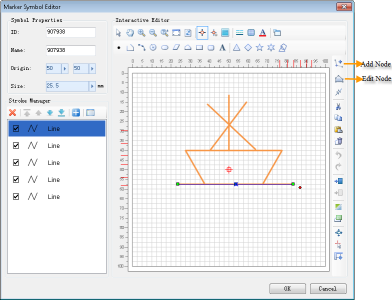
- In the symbol editing area, select the stroke to be edited, or select a stroke through the stroke list in the Stroke Manager area;
- Click the Add Node button. At this time, the Operation Status in the symbol editing area will be switched to the Add Node status, and the selected stroke will display its All Node. Click the mouse at the target position of the selected stroke to add Node at the corresponding position;
- Click the Edit Node button. At this time, the Operation Status in the symbol editing area will be switched to the edit point status, and the selected stroke will display its All Node. The following editing operations can be performed:
(1) Select a node, press and hold the left mouse button, and move the mouse to move the node;
(2) Select a node and press the Delete key to Delete the selected nodes.
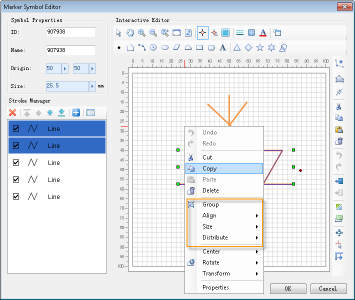
Stroke layout
Stroke layout mainly refers to the position layout of strokes in the symbol editing area, including the position relationship of strokes relative to the symbol editing area.
- In the symbol editing area, select the stroke to be operated, or select the stroke through the stroke list in the Stroke Manager area, or select multiple strokes at the same time;
- Right click the mouse to open the Context Menu in the symbol editing area. The following items in the Context Menu can be used to complete the layout of stroke positions:
- Horizon tally Align Center: Aligns the horizontal direction of the center point of the selected stroke with the horizontal direction of the center point of the symbol editing area.
- Vertically Align Center: Aligns the vertical direction of the center point of the selected stroke with the vertical direction of the center point of the symbol editing area.
- Center: Aligns the center point of the selected stroke with the center point of the symbol editing area.
 Hint:
Hint: - When multiple strokes are selected, it is used to set the position relationship between the center point of the minimum Bounds of the selected strokes and the center point of the symbol editing area.
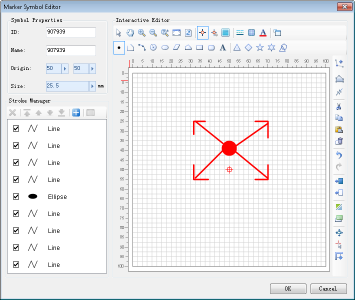
Stroke rotation
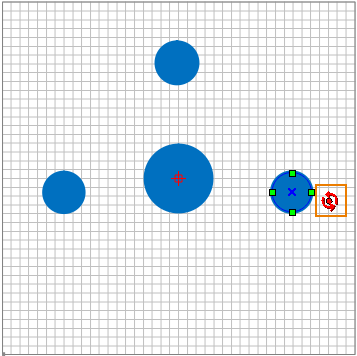
- In the symbol editing area, select the stroke to be operated, or select the stroke through the stroke list in the Stroke Manager area, or select multiple strokes at the same time;
- A red dot will appear on the right of the selected stroke. Move Stop by Mouse to the red dot, and the mouse style will change to a rotation icon, as shown in the following figure. At this time, you can rotate the stroke by pressing the left mouse button for a long time.
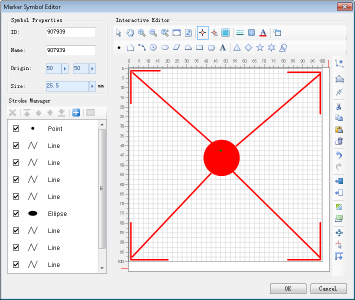
The stroke is full
The stroke filling function can fill all the stroke contents currently drawn in the symbol editing area with the Valid Range of the symbol editing area.
Click the Stroke Full button as shown in the following figure to set the Valid Range of the Full editing area of the point symbol in the current symbol editing area.