


Face object node editing
Instructions for use
When a layer in the scene is editable, select a face object to edit its node. The 3D Node editing function is applicable to 2D Region Dataset, CADCAD, and 3D Region Dataset.
Operating instructions
2D Face Object Node Edit
- Load a vector Region Dataset or CAD Dataset into the scene and set the layer to editable.
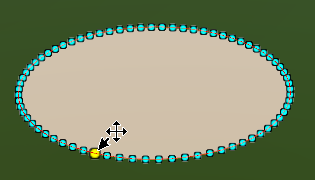
- Select the face object requiring Edit Node in the scene. Currently, only one selected object can be subject to Edit Node operation. Node editing includes operations such as Move Node, Delete Node, and Add Node.
- Move Node: Place the mouse on a node on the face object. When the Node Color turns yellow, the node is selected. Hold down the left mouse button on the selected node and drag the mouse at the same time to move the selected node. After the movement is completed, release the left mouse button. Move the other nodes in the same way, and the Geometry shape will change accordingly.
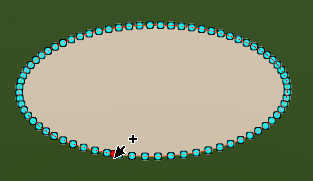
- Delete Node: Place the mouse over a node on the face object to select the node, and press Shift + Delete to delete the selected node.
- Add Node: Click the left mouse button anywhere on the boundary line of the selected face object to add a new node at the mouse click.
Move/Delete Node Add Node
Region3D Node Edit
- Set the 3D Region DatasetAdd to Scene and make the layer editable.
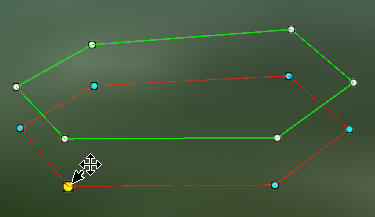
- Select the face object requiring Edit Node in the scene. Currently, Edit Node operations can only be performed on one selected object. The node editing of Region3D includes operations such as Move Node, Delete Node, and Add Node. Region3D consists of a range and an elevation. The green wireframe is the elevation surface, and the red wireframe is the range surface, as shown in the following figure: 3D faces are selected in selected
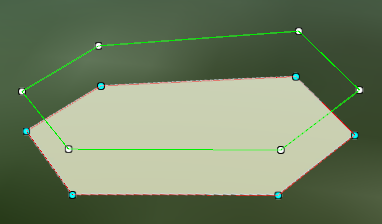
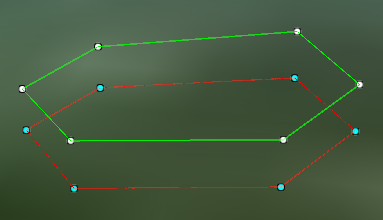
ground mode 3D faces in non-ground mode - Move Range Face Node: Place the mouse on a node of the range face of Region3D. When the Node Color turns yellow, the node is selected. Hold down the left mouse button on the selected node and drag the mouse to move the selected node. After the movement is completed, release the left mouse button. Moving an extent face node changes the shape of the Geometry and the extent of the level face.
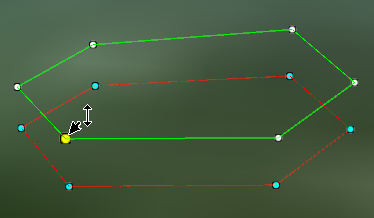
- Move Elevation Surface Node: Place the mouse on a node on the elevation surface of Region3D. When the Node Color turns yellow, the node is selected. Hold down the left mouse button on the selected node and drag the mouse up and down at the same time to change the elevation value of the selected node. Release the left mouse button. The Geometry level value changes when you move the level face node.
Note: If the elevation surface coincides with the range surface, after selecting the node, hold down the Shift key and move the mouse to edit the elevation node of the surface object.
Shift to move the level face node when - Delete Node: Place the mouse over a node on the face object to select the node, and press Shift + Delete to delete the selected node.
- Add Node: Click the left mouse button anywhere on the boundary line of the selected face object to add a new node at the mouse click.
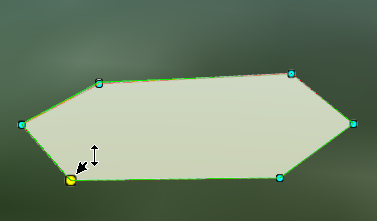
Move the range face node Move the level surface node coincident
 Precautions
After selecting the face object node, press Shift + Delete to delete the node; press Delete only to delete the selected face object.