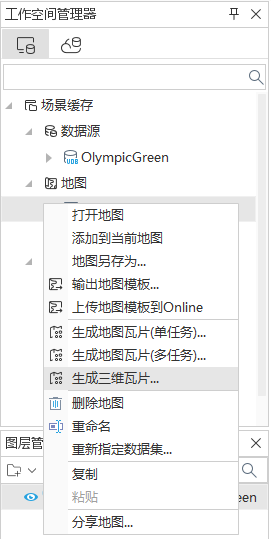
Generate 3D Tiles from Map
Instructions for use
Generate 3D Tiles from Map can be used to improve the efficiency of map display in the scene.
Operation steps
 |
| Figure: Generate 3D Tiles from Map. |
- Select the Generate 3D Tiles.. "In one of the map Context Menus in Workspace Manager.
- The Generate 3D Tiles from Map "dialog box pops up, which is used to set the parameters of the map 3D Tiles.
- Parameter Settings:
- Tile Name: In the text box to the right of the Tile Name ", enter tile name, which is the name of the root of the tile.
- Tile Path: Enter the Export Directory of the tile in the text box on the right side of the "Tile Path:" Tile Path ", which can be a local path; users can also select the path through the"
 Browse "button behind the text box.
 - Scene Type: The system provides two Scene Types, spherical and planar. Scene Type supports switching to flat when the Map Coordinate System is Projected Coordinate System.
- Storage Format: The system provides 2 Storage Formats, compact and original. The compact representation uses a certain compression and encryption mechanism to compress and encrypt the data when building the Tile; the original representation does not compress the data and retains the original information of the Model Data.
- Password: Encrypt the 3D Map TilesSet Password to ensure data security. You need to enter a password when loading the 3D Map Tiles.
- Tile format: Set the type of tile to save. Application supports image formats such as PNG, JPG, and WEBP.
- The size of tiles:: Obtain the sampling size of each tile block file generated after tile preprocessing, in pixels, i.e. pixes * pixes. Application provides three sizes of 1024 * 1024, 512 * 512 and 256 * 256 for users to choose. The user can select the appropriate size.
- Tile compression rate:: Set the compression rate for generating 3D Map tiles, in%.
- Number of Threads: The number of threads assigned to the Generate 3D Tiles from Map operation. The default is 1. The two options of
- Completely fill the tile image., Background Transparency: can be selected as required.
- Set the Tile Bounds ":
- Tile Bounds: There are two ways to set in the "Tile Bounds" "area:
- Check the "Default range" check box, the range of Dataset is used by default, and the four text boxes on the upper left and lower right display the system Default range;
- Uncheck the "Default range" checkbox to allow the user to Custom Bounds. There are two ways, one is to select the range of the selected Dataset by selecting Bounds Dataset, and the other is to directly enter the range value in the upper left and lower right text boxes.
- Tile Bounds: There are two ways to set in the "Tile Bounds" "area:
- Start layer, end layer: automatically obtain the layer number of 3D Tiles, and the end layer can be modified.
- Click the "OK" button to execute the Generate 3D Tiles from Map operation and generate a Tile file in *.sci3d format.
 Caution:
 - When Tile Bounds is set, if the "Default" check box is not checked, the text boxes at the bottom left and top right become editable, and you can directly enter the required Tile Bounds.
- The Generate 3D Tiles from Map feature does not support maps with a coordinate system of Planar Coordinate System.


