Artwork placement based on 3D point tiles
This page describes how to generate tiles based on the dot plug-in model, and the ability to plant trees or place sketches.
This feature requires the use of SuperMap iDesktop/iDesktopX, which is detailed in the Product Acquisition and Operation Guide.
This page illustrates the effect of planting trees as an example. The steps and methods for placing other sketches are similar. The specific operation steps are as follows:
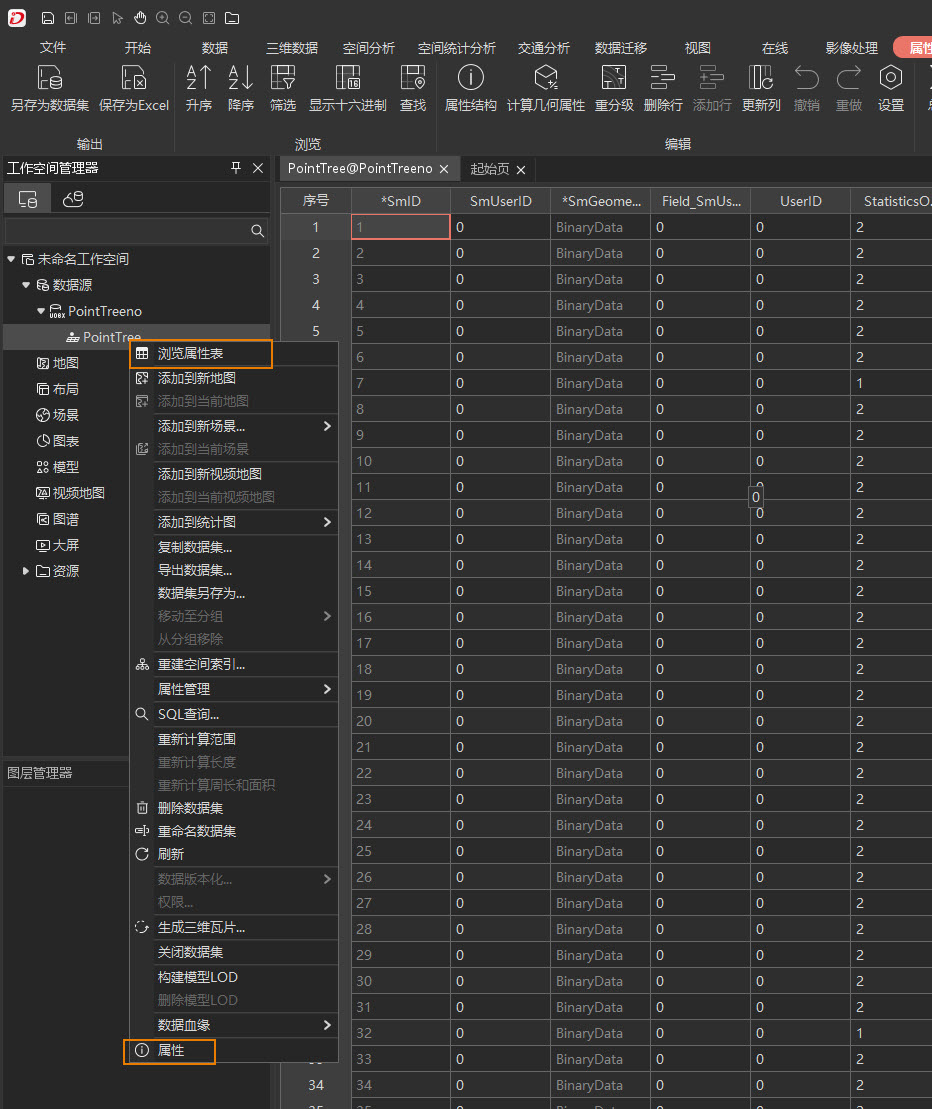
- Open SuperMap iDesktop/iDesktopX, load the data source file (UDB/UDBX) where the target 3D point dataset is located, left click to select the target dataset, right click, and then select Browse Attribute Table and Attributes from the pop-up right-click menu to open the Data Attribute Panel and Data Attribute Table.
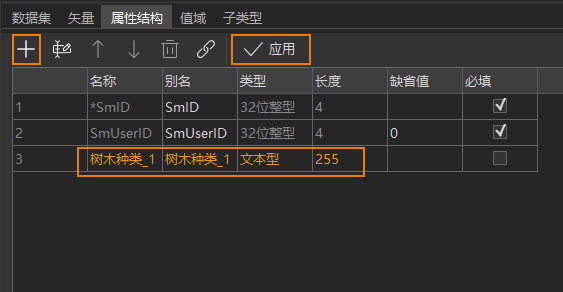
- In the Attribute Panel, click Select Attribute Structure and add Attribute Field: "Tree Species_1."
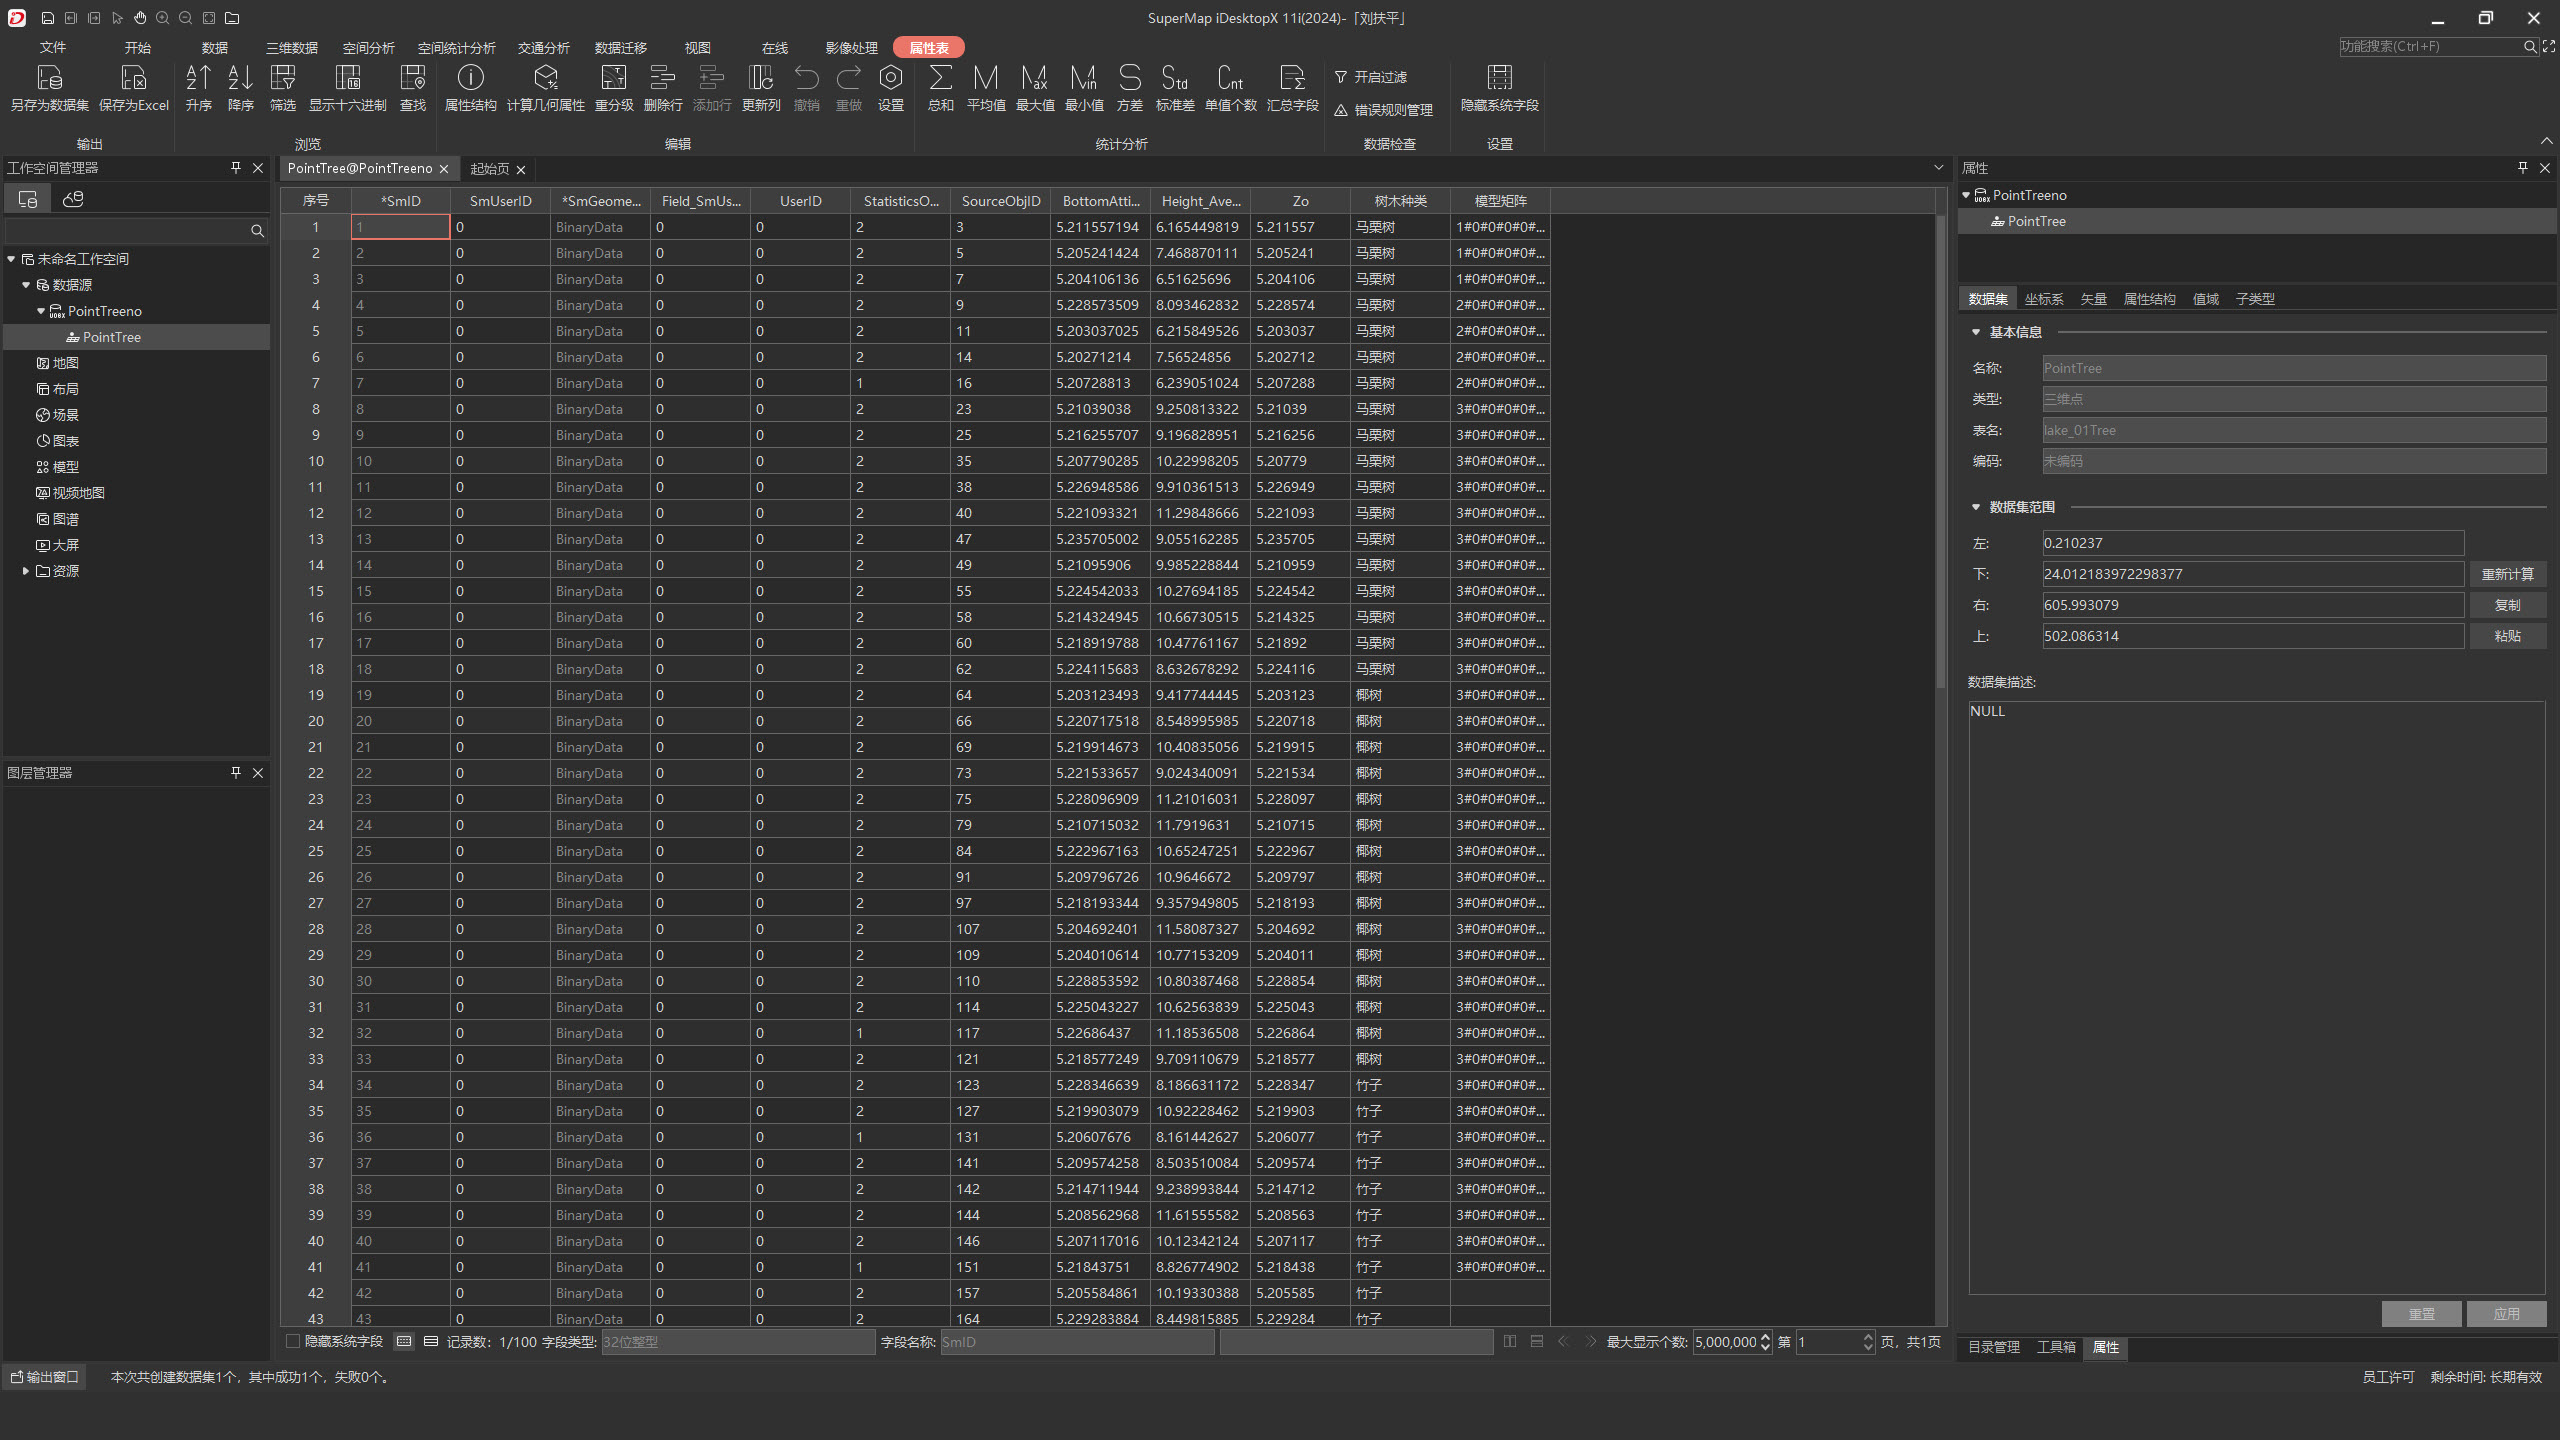
- In the attribute table, edit the attribute value of the attribute field Tree Type_1, copy and paste the Unreal Engine asset path expected to be referenced in the project into each object and paste it in the specific attribute value box.
- If you want to realize the scaling setting of the plug-in sketch, you can realize it through the model matrix field. The specific operation steps are as follows:
- In addition to adding and editing the Tree Type field in the 3D point attribute table, you also need to add and edit the Model Matrix field (text field).
- Control model scaling by typing specific numerical values in the corresponding model matrix attribute values, for example, 3#0#0#0#2#0#0#0#1#0#0#0#1, which means zooming in 3, 2, 1 times along xyz axis respectively
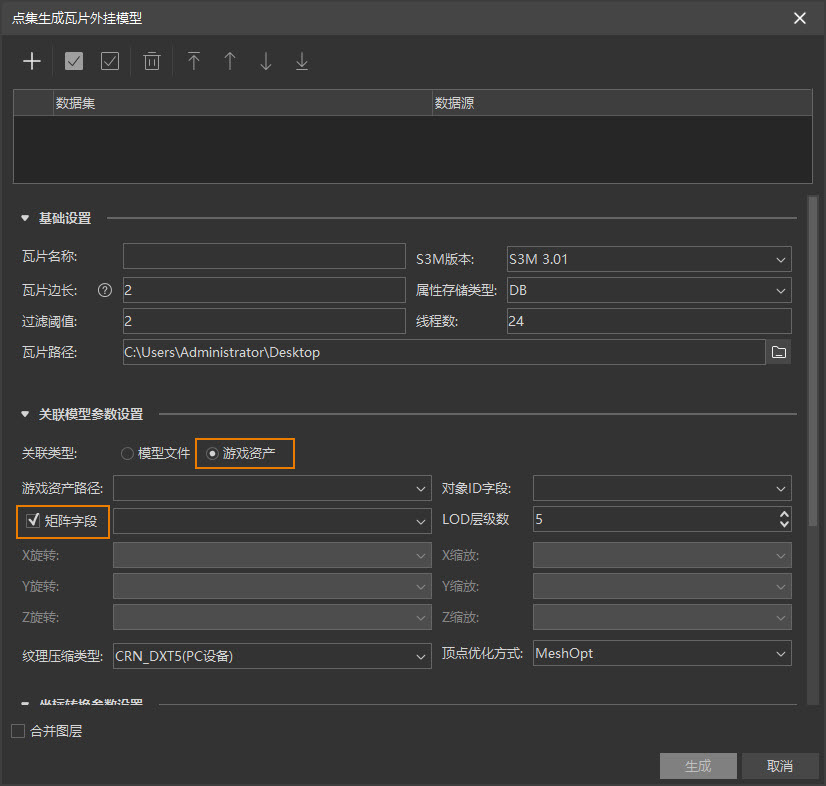
- After editing, click SuperMap iDesktop/iDesktopX -> 3D Data -> Generate Tile -> Click Generate Tile Plug-in Model to pop up the Settings Panel.
- Set parameters where the Game Engine Asset Path and Matrix fields must be checked and set.
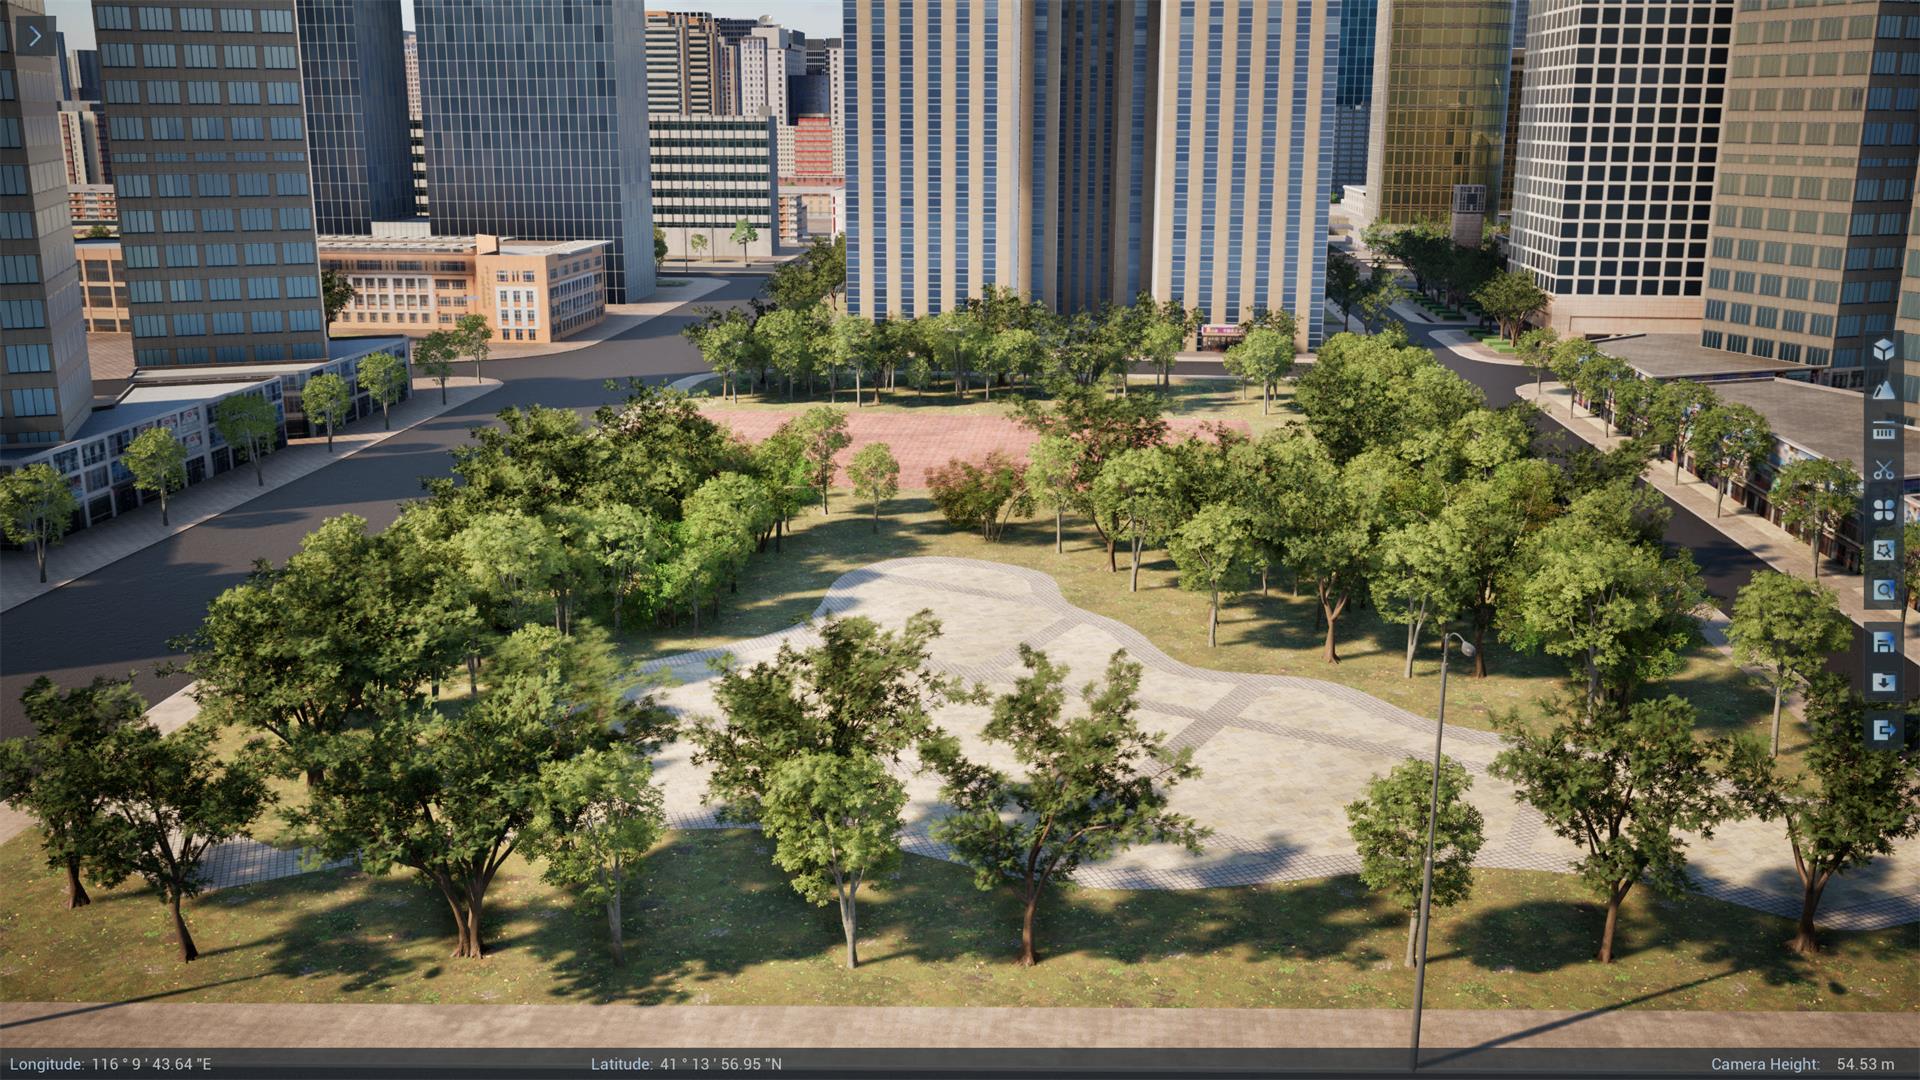
- After tile data is generated, load and display it in Unreal Engine, and you can see the point tree effect.