This page describes how to create mask textures with SuperMap iDesktopX 10i (2022) and above.
Model Material Export
This section is mainly about exporting city fine model material maps through SuperMap iDesktopX. The procedure is as follows:
- Open SuperMap iDesktopX 10i (2022) and above, load the data source where the city fine model is located.
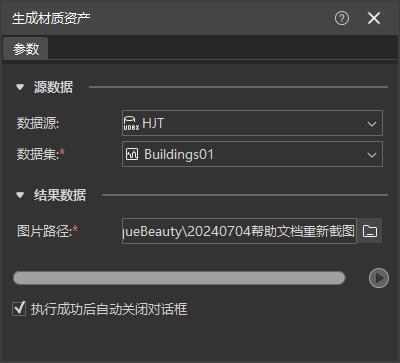
- Click Toolbox -> 3D Data -> Material Processing -> Generate Material Assets to pop up the Generate Material Assets panel. Set parameters such as source data and export image path according to requirements, and then click Run .
- After extraction, export all texture maps in the model dataset as *.png pictures. If the city fine model itself has a texture map of *.jpg or *.png, it can also be used directly in subsequent steps. If the data has baked texture images in * thd.png format, you can delete them in bulk.
Windows Extraction Based on AI
This part mainly uses SuperMap iDesktopX to identify and extract windows in large-scale city fine model based on AI.
The product provides multiple trained models, which can be used to extract windows directly, saving user model training time. If this scheme is adopted, the operation of "identifying windows based on training results" can be directly carried out.
Users can also use their own texture training to obtain new training models according to their needs. The main idea is to divide the model texture obtained in the above part into two parts, one part is used as a sample for manually extracting windows, and the other part is used as an AI training object to automatically extract windows. The whole process operation steps are as follows:
Manual window sampling
- Select some texture pictures from the model texture as samples. Samples need to be representative of the whole and valid textures (with windows). The recommended sample size is more than 100.
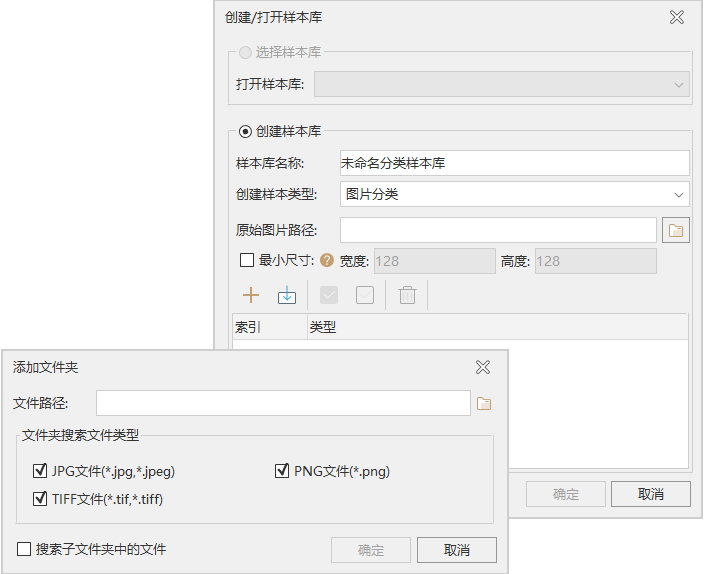
- Start SuperMap iDesktopX, click Start -> Browse -> Sample Management -> Picture Sample Management , and the Create/Open Sample Library dialog box pops up. Create a new sample library by setting parameters, where the sample type selects image label, and the original image path is the path where the sample texture is located.
- Draw and label window areas on texture pictures with windows in the sample library through Picture Sample Management -> Sample Label Management -> Face or Batch Drawing, where the label of glass part is set to Glass, the label of metal part of window frame is set to Metal, and the label of stone part of window is set to Stone.
- Export the samples extracted by sample label to the specified path after setting export parameters (target detection selected for sample library purpose) through Picture Sample Management -> Sample Management -> Export Sample Library function. Export results mainly include:
- Annotations_train: The training set of the sample library, saving a txt file that records the sample label type and position corresponding to the image.
- Annotations_val: Validation set of sample library, save txt file with sample label type and position corresponding to image.
- Images: Images of all texture maps with windows in the training and validation sets.
- *.sda: Sample profile.
The effect of imported image sample library is as follows:
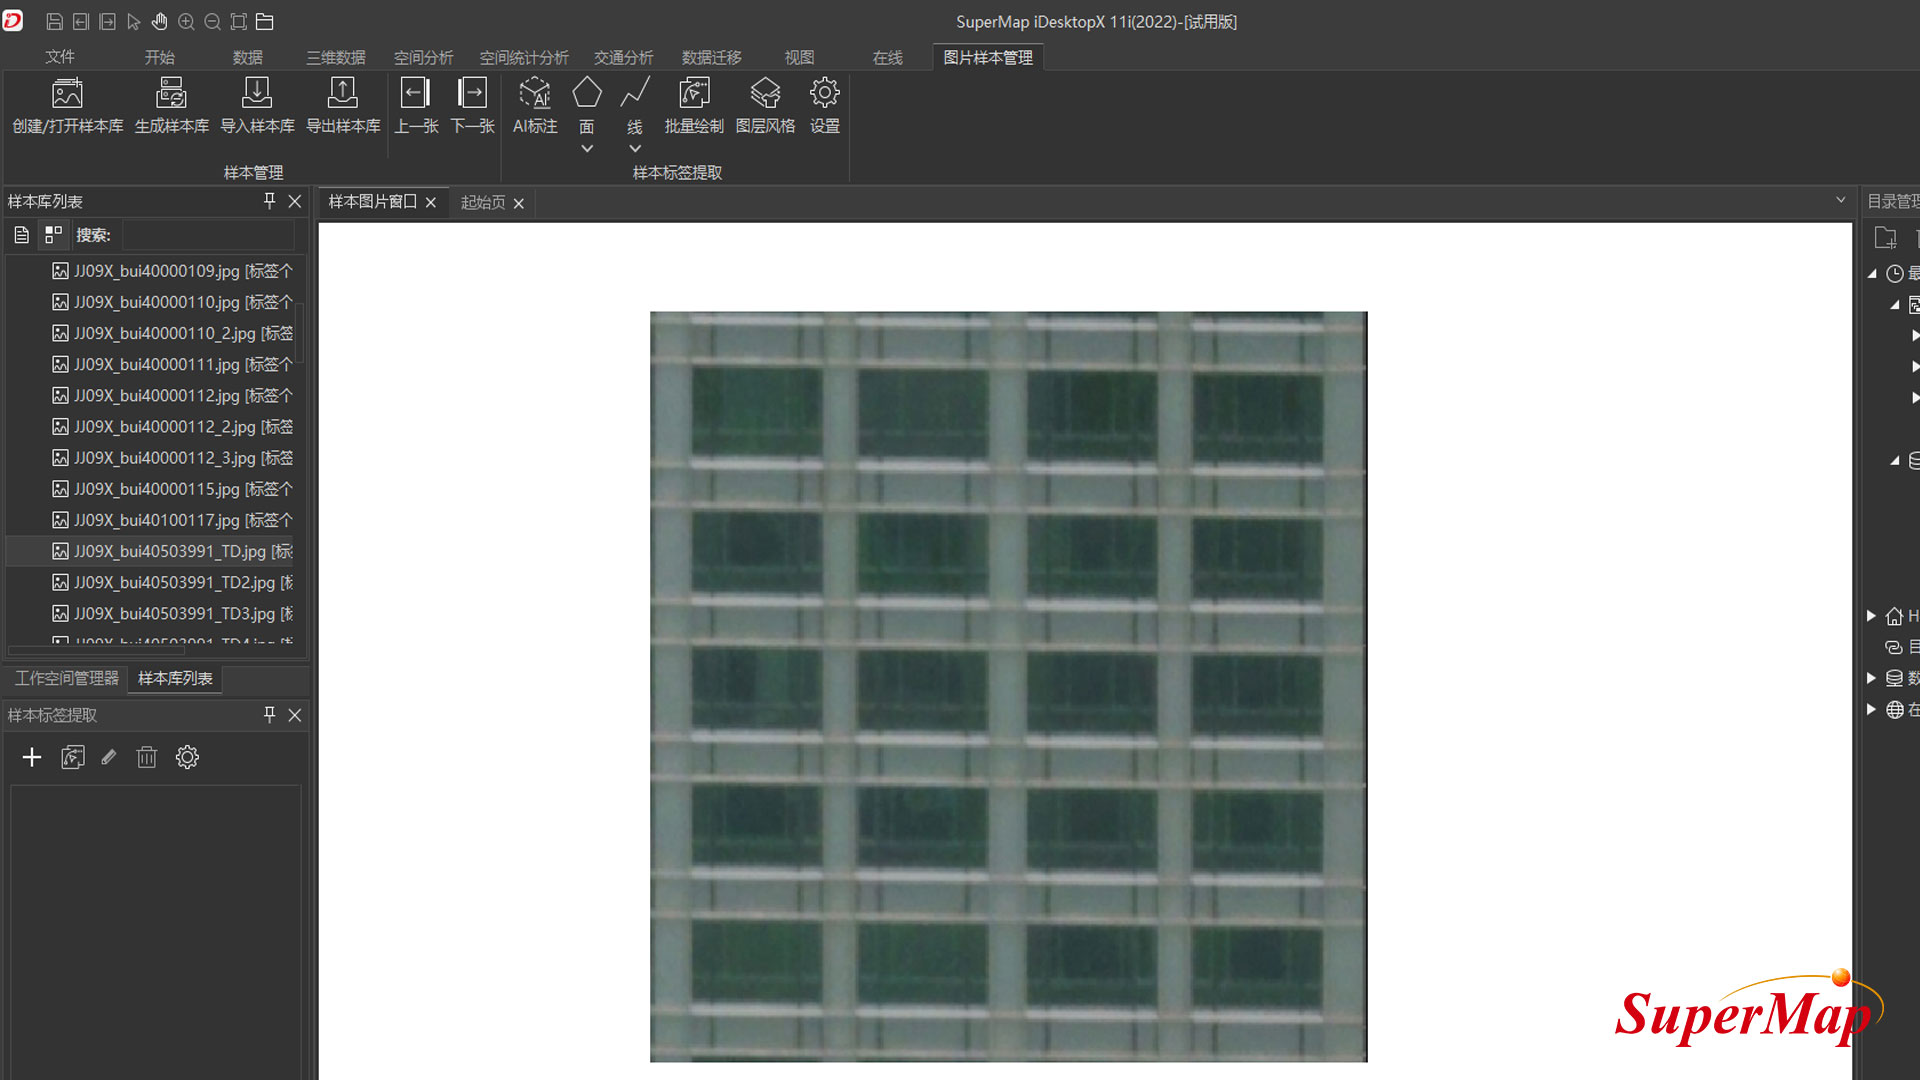
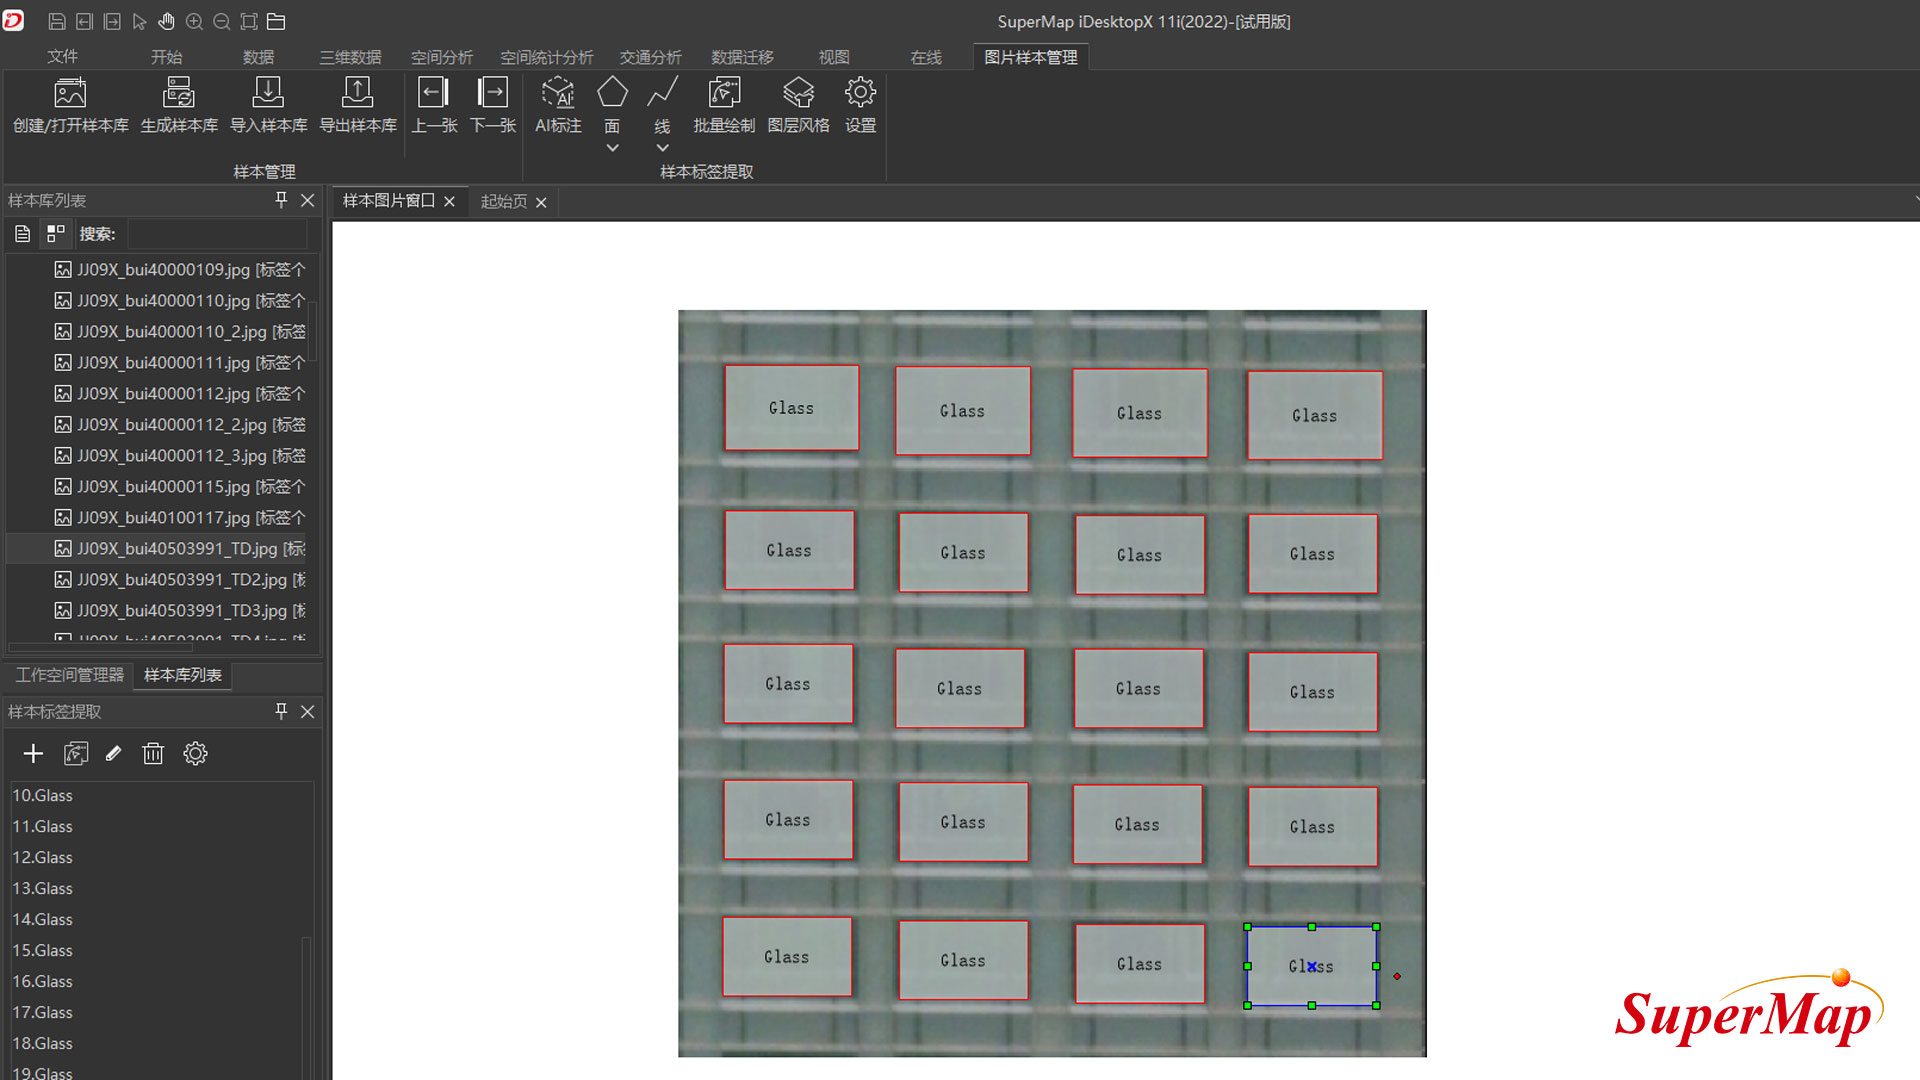
 suggest
When extracting sample labels, try to draw and label correctly and comprehensively, which is helpful to improve the recognition effect of subsequent automatic window extraction.
Configure AI Training Environment
- Close SuperMap iDesktopX software, get and extract AI extension package. See machine learning environment configuration for specific operation steps.
- Open the folder where the currently used SuperMap iDesktopX is installed, copy and paste the resources_ml folder from the AI extension package into the root directory.
- Then copy and paste the AI Extension Pack\support\MiniConda\conda folder into the SuperMap iDesktopX\support\MiniConda folder.
- Configure Python environment.
- Open SuperMap iDesktopX, click the Start -> Browse -> Python button, and then click the Python Environment Management button on the left toolbar of the Python window that pops up.
- Select SuperMap iDesktopX package/support/MiniConda/conda/python.exe environment in the Python Environment Management dialog box, click OK, and restart Python environment.
- The Python window pops up and the configuration succeeds.
Model training
- Click Toolbox -> Machine Learning -> Image Analysis -> Model Training Tools to pop up the Model Training dialog box.
- Set the training data path and select the previously exported image sample library path.
- Set training model usage, select target detection.
- Set the model algorithm, here we recommend using Cascade R-CNN.
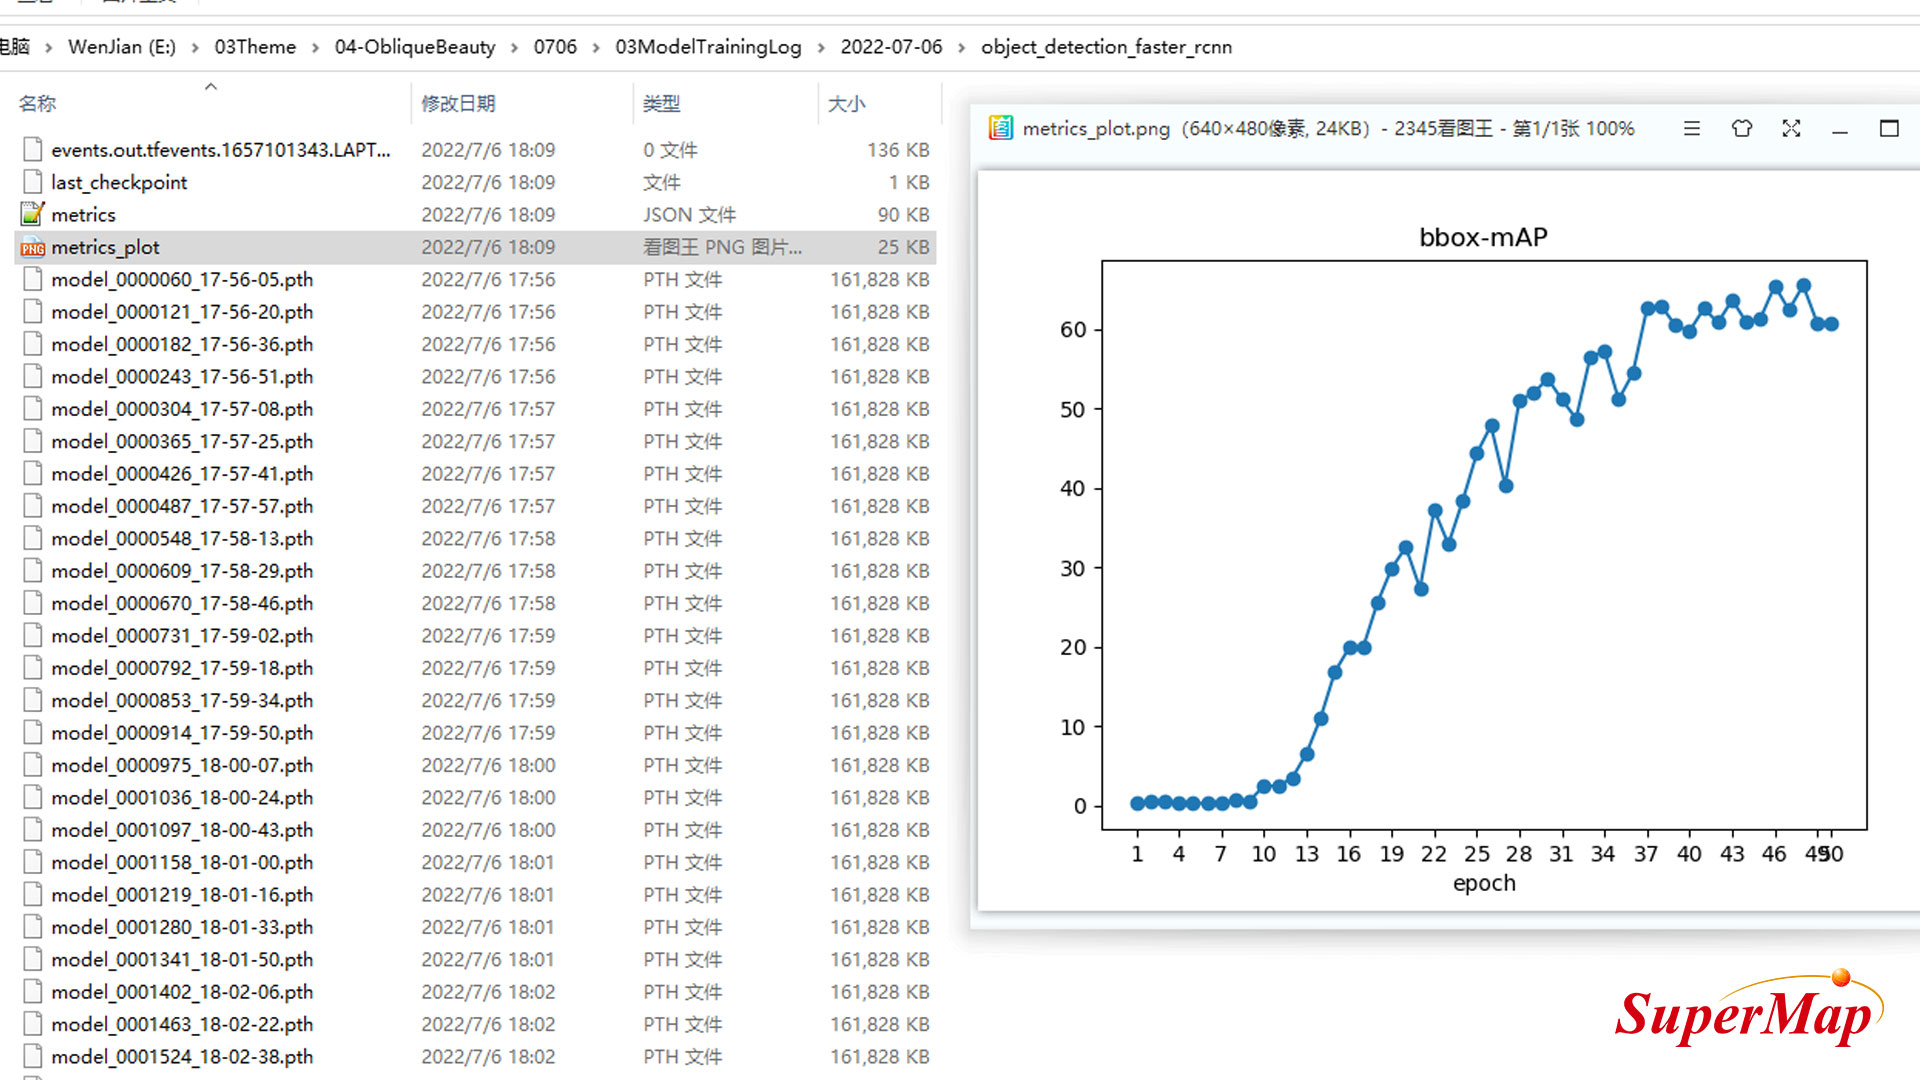
- Set the number of training sessions, here 50 is recommended. Generally speaking, the higher the number of times, the more accurate the effect, but after reaching a certain number of times, the accuracy rate will not increase.
- Set the path for model storage results.
- Once the parameters are set, click Run to generate training results.
Here is a way to determine if the training is appropriate.
During model training, metrics_plot.png images are generated under the training log path to record the relationship between training times and training accuracy. As shown in the figure below, we can see that the broken line of the accuracy rate when the training times are small is in an increasing state, indicating that the accuracy of training is also improved with the increase of the training times, but when the training times reach 40 times, the broken line tends to be parallel to the horizontal axis, indicating that the accuracy of training cannot be significantly improved by increasing the training times.
Identifying windows based on training results
- Based on the above training results, target detection is used to detect and identify windows in other texture pictures.
- Click Toolbox - Machine Learning - Image Analysis - Target Detection Tools to pop up the Target Detection Settings panel.
- Set up the source data file and enter the texture map path to extract the window.
- setting a model file, and inputting the model training result path obtained in the above steps.
- Set probability threshold, the higher the value, the more accurate the window extraction, but the number of omissions also increased.
- Sets the path to the result file, specifying the output path to the result file and the folder name.
- When the parameters are set, click Run . Generate detection results and output multiple sets of one-to-one corresponding texture maps and XML files. The size and position of the identified window are recorded in the XML file. For ease of viewing, you can also create new Annotation and Images folders for XML files and texture maps, respectively.
- Click Picture Sample Management -> Sample Management -> Import Sample Library , pop up Select Sample Library Settings Panel, select the texture map exported in the previous step, you can view and modify the effect of identifying and extracting windows.
- Merging the files in the sample library with the files identified by detection can obtain all the result files extracted from the windows in the project.
Make mask texture
This section describes how to create mask textures based on the extracted window result file.
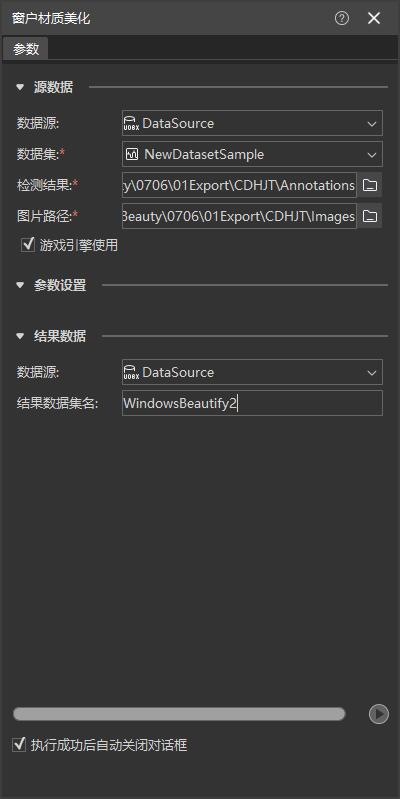
- Click Toolbox -> 3D Data -> Material Processing -> Window Material Beautification Tool to pop up the Window Material Beautification Settings panel.
- Set the path of detection result, where the xml file with window position extracted by AI is located.
- Set the image path to the original texture image corresponding to the xml file.
- Check "Game Engine Usage".
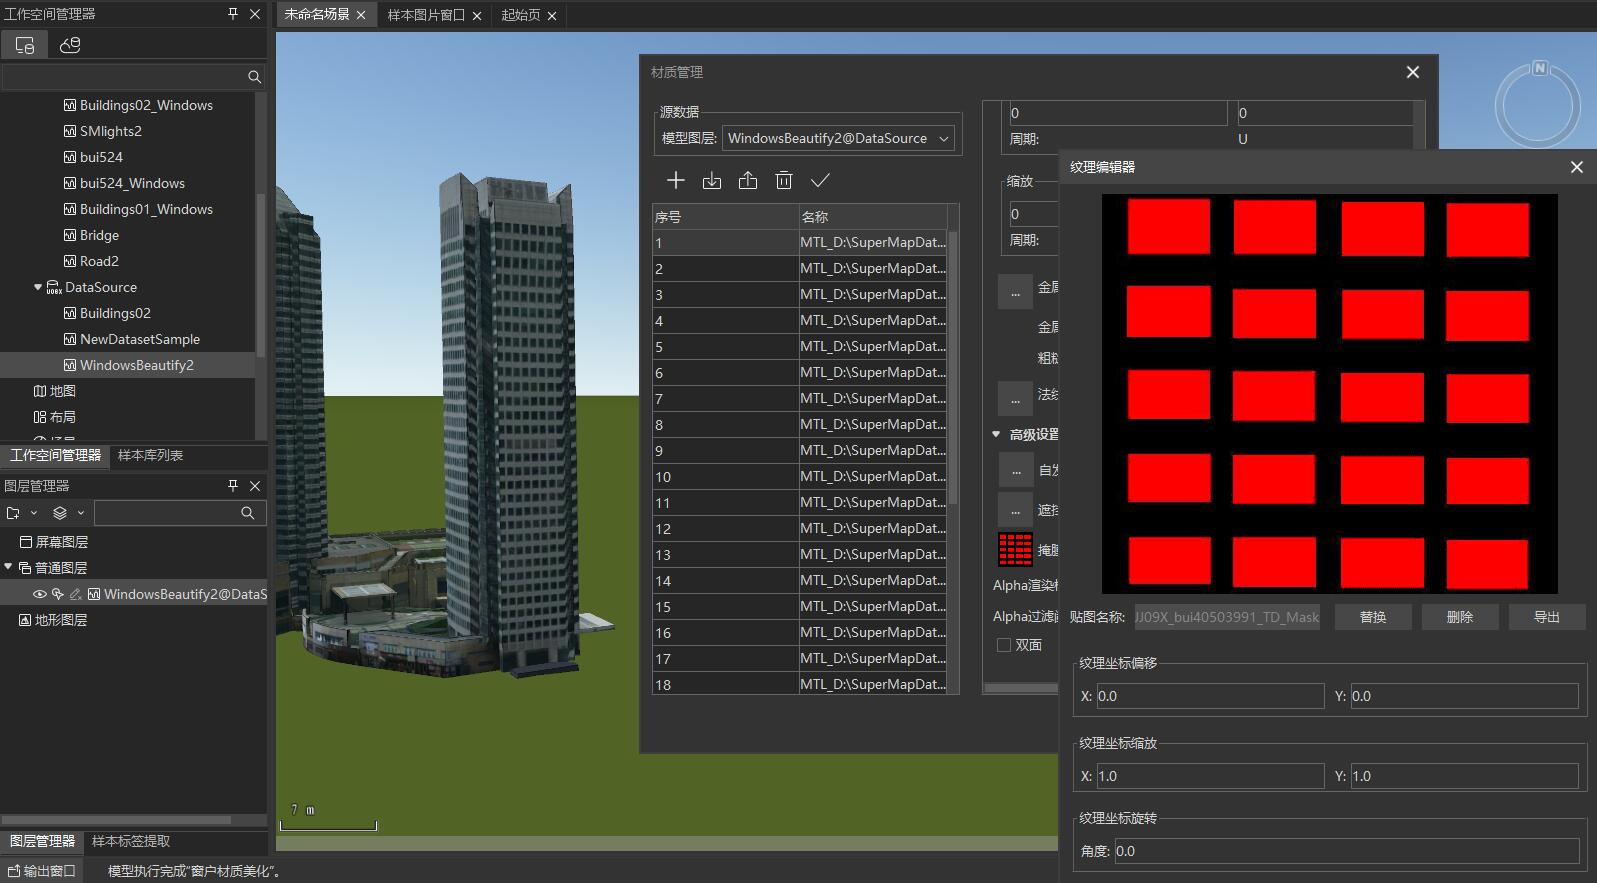
- Once setup is complete, click Run to generate a model dataset with masked textures. The dataset was changed from normal to PBR, and a new mask texture was added, in which the glass part was filled in red, the metal part in green, the stone part in blue, and the rest in black.
